Quick Links
-
How to Use SDelete to Delete Files Permanently
Files deleted from your PC are still recoverable, at least in the short term. To ensure that files are permanently deleted, you can use SDelete. This command-line utility securely erases data, making it unrecoverable.
What is SDelete?
When you delete a file, the computer simply marks the space occupied by the data as unallocated. This means that until another application overwrites data into that space, the contents are recoverable using data recovery tools.
SDelete can ensure deleted files are safe from recovery. This command-line utility not only deletes existing files but also clears previously deleted data lingering in the unallocated portions of your disk. The tool securely erases data using the robust data deletion standard DOD 5220.22-M, recommended by the U.S. Department of Défense. It works by overwriting file data on disk clusters.
How to Install SDelete
To get started, head to Microsoft Sysinternal’s page. Click Download SDelete to save the zipped file to your local drive. Right-click the download file, choose Extract All, choose a destination folder, and then click Extract.
Since SDelete is a command-line utility, it doesn’t function like a conventional application with a graphical interface. To set it up, first move the extracted SDelete folder to the C:Program Files directory. Once done, follow these steps:
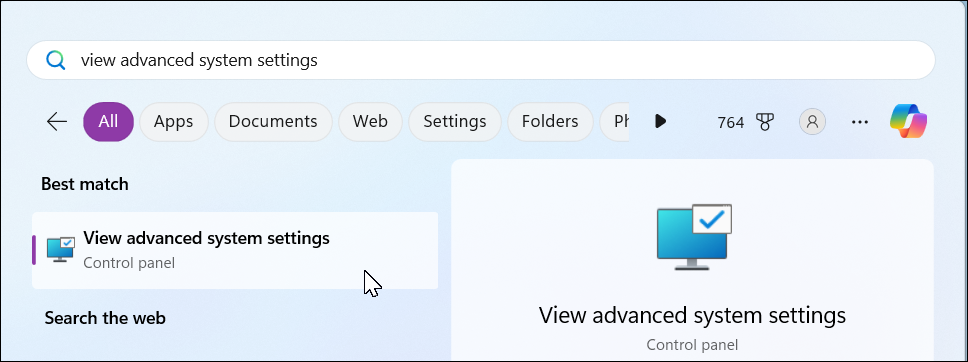
- Click Start, type view advanced system settings, and open the best matching result.
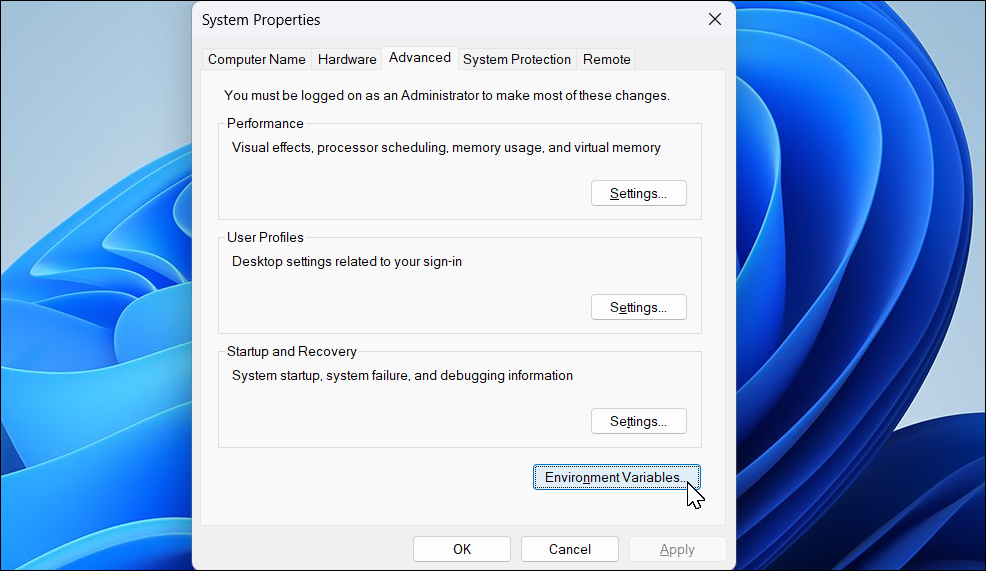
- Select Environment Variables.
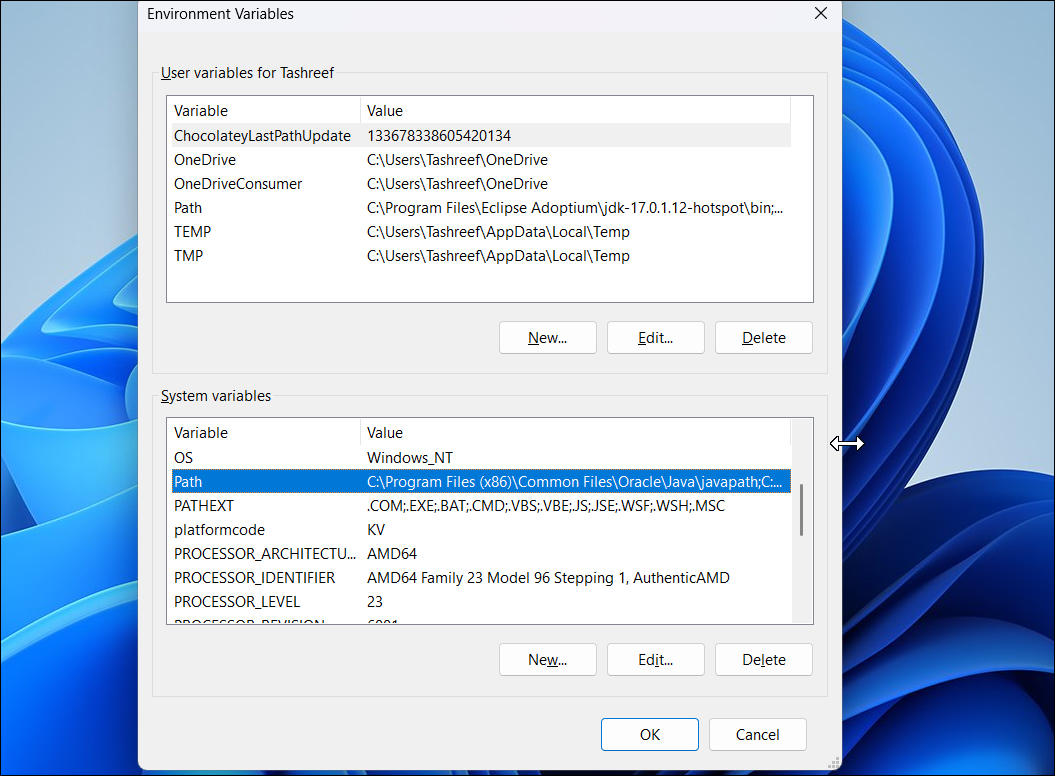
- Under System variables, select the Path line and choose Edit.
- Select New to add a new line, then click Browse. Navigate to C:Program Files, and choose the SDelete folder.
- Click OK on all the open dialog boxes.
With SDelete configured, let’s launch the tool and see how it works.
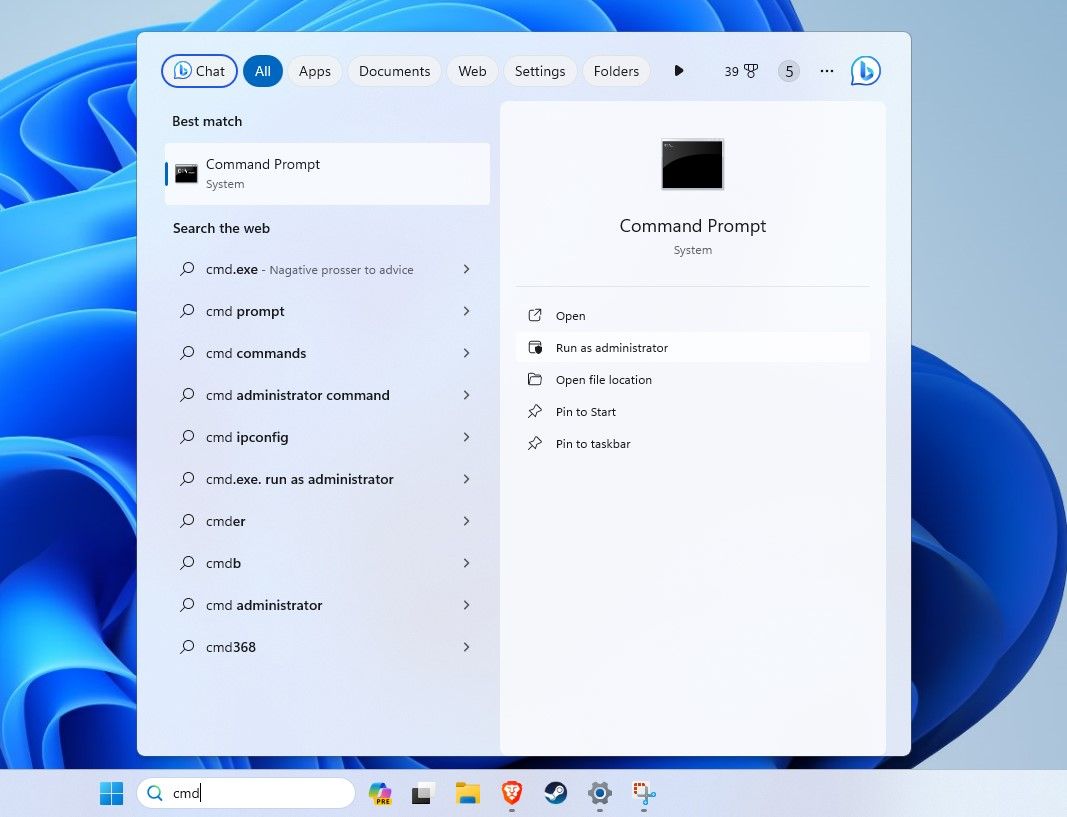
- Click Start, type cmd, right-click on Command Prompt, and choose Run as Administrator.
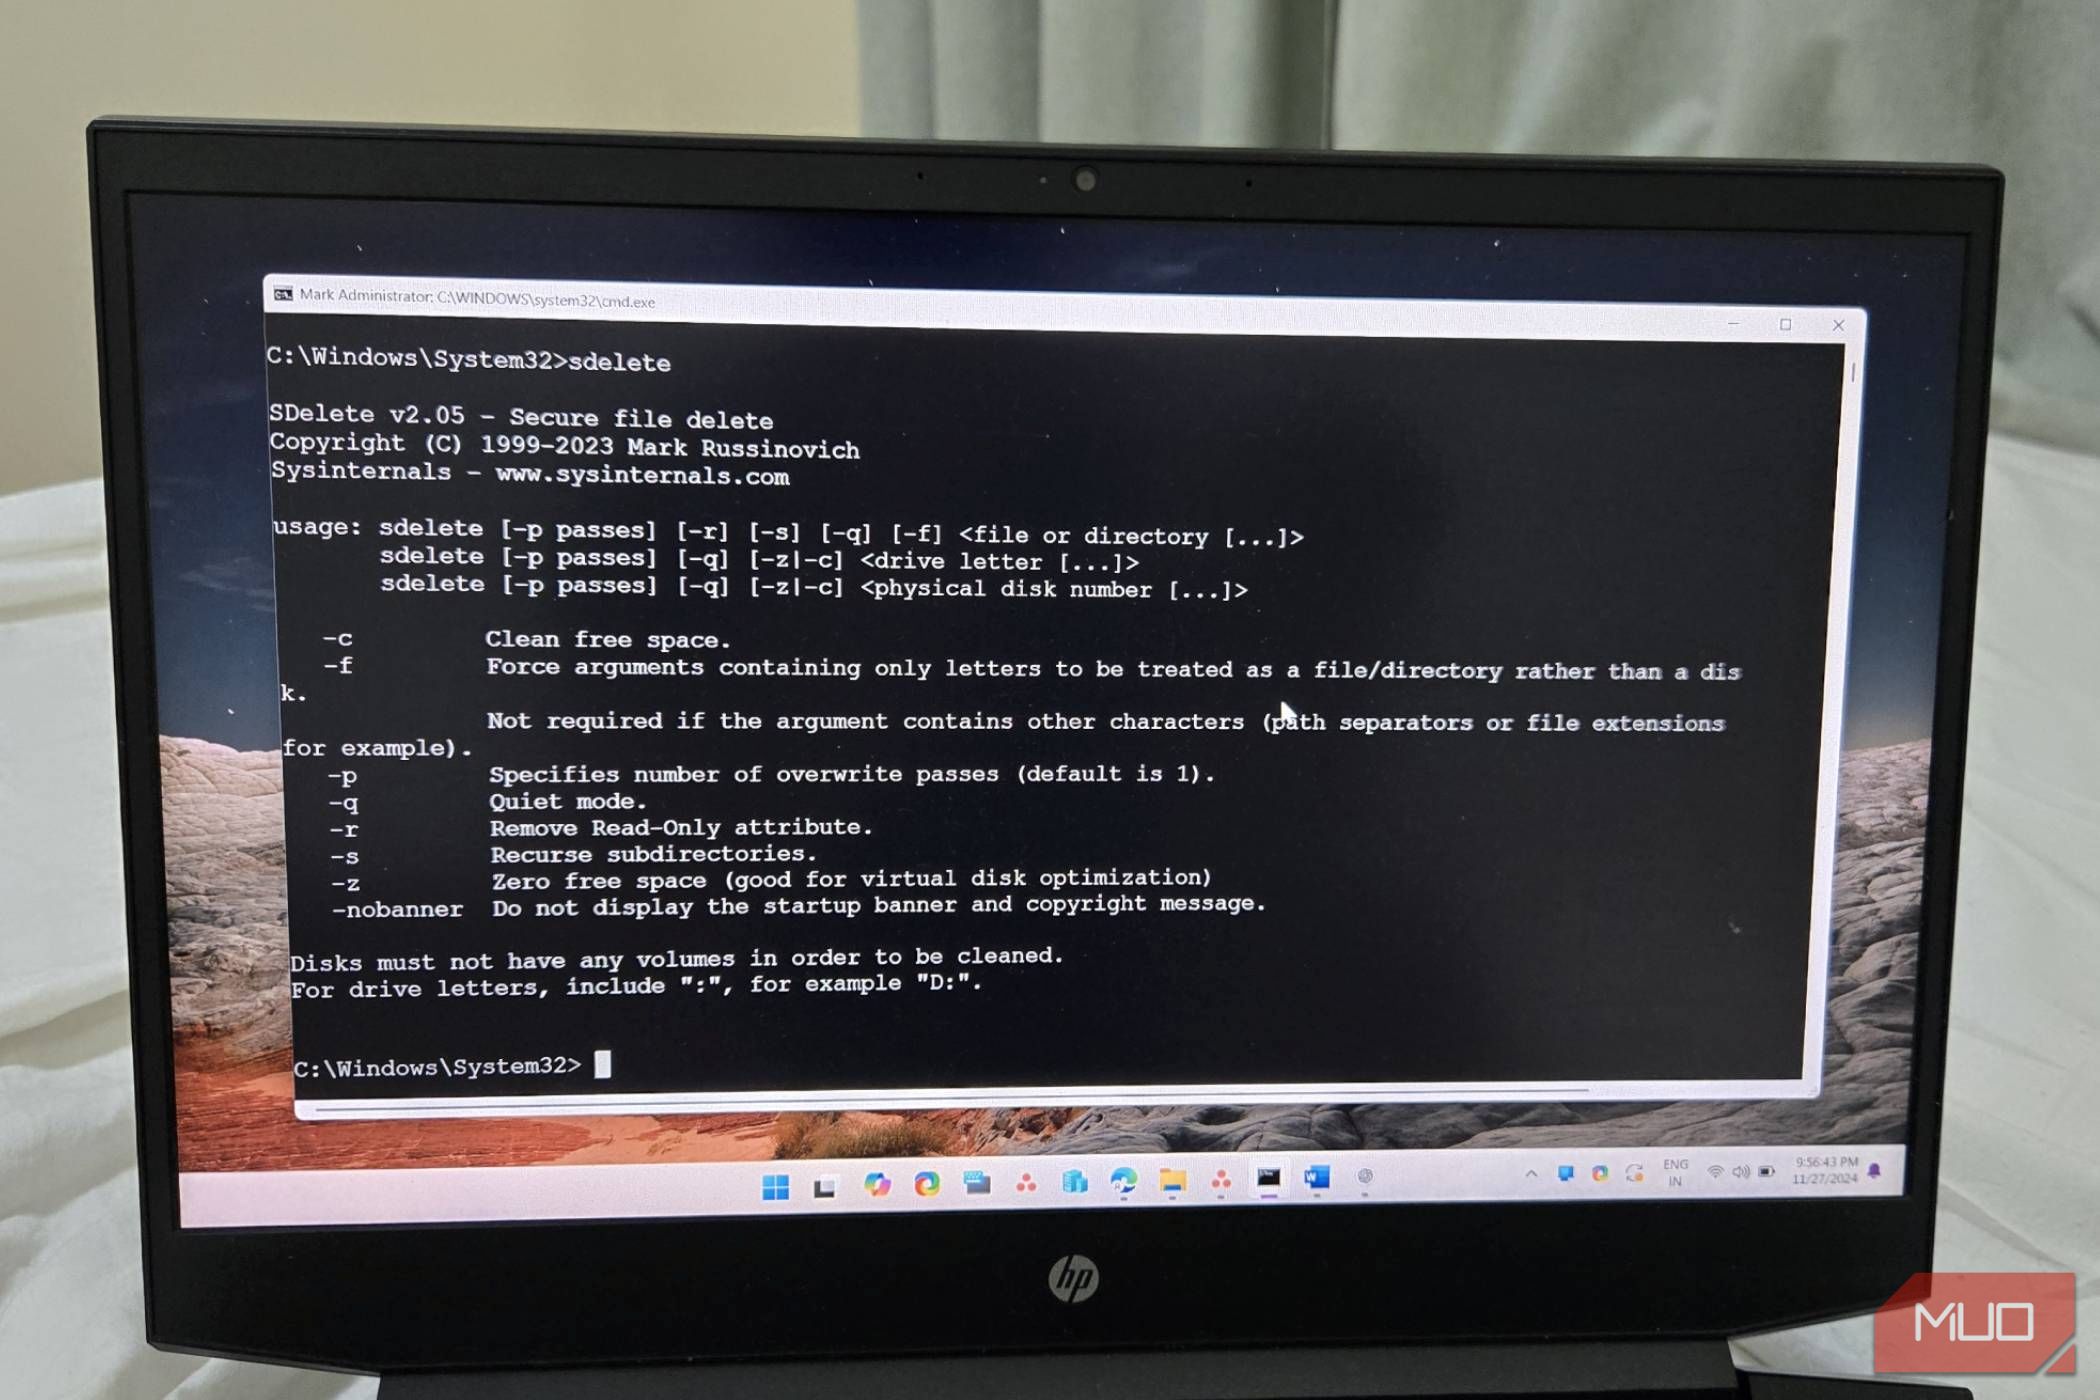
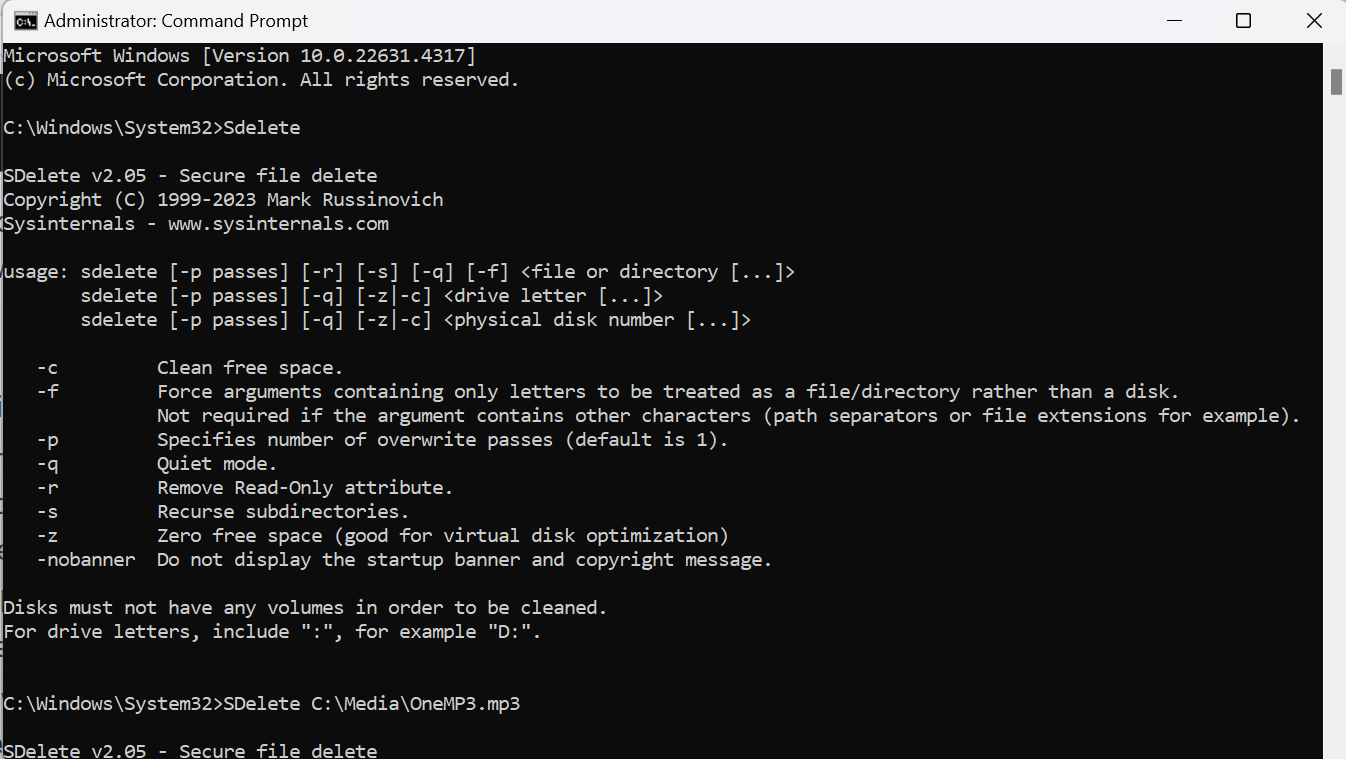
- Type SDelete and hit Enter in the Command Prompt window to launch the tool. You’ll also see the SDelete License Agreement dialog the first time the tool is run. Click Agree to close it.
How to Use SDelete to Delete Files Permanently
Before starting, it’s a good idea to back up your data. Additionally, consider testing SDelete on a virtual machine first to minimize the risk of accidentally deleting important files. If you don’t have a virtual machine yet, you can easily set up a virtual machine on your Windows PC to test it.
To get started, launch Command Prompt as an administrator. In Command Prompt, type SDelete and press Enter to launch the tool. This will display a list of parameters and arguments you can use with the SDelete command for securely deleting files and cleaning up disk space.
For this guide, we’ll securely delete an MP3 file located in the C: Media folder. Open File Explorer, locate and right-click the MP3 file, then select Copy as Path to copy its full file path.
Next, in the Command Prompt, type SDelete followed by the file path. For example, the full command would look like this:
SDelete C:MediaOneMP3.mp3
Press Enter to execute the command. If successful, you’ll see the output:
Files deleted: 1
Next, let’s try deleting the Media folder located in C:.
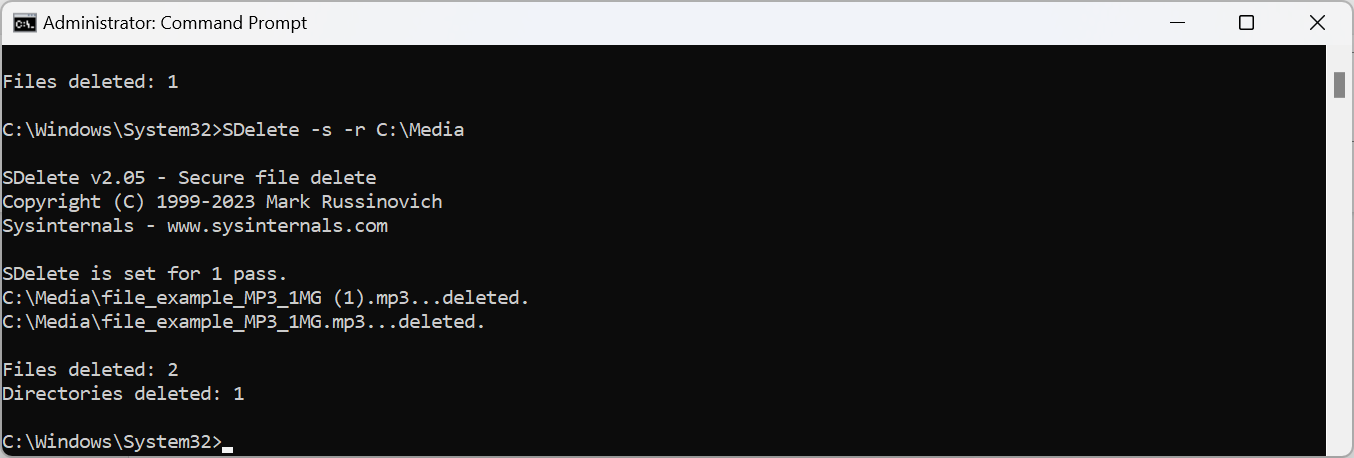
When removing a folder, you need to include its subdirectories and handle any read-only attributes to ensure everything is cleaned up properly. To do this, use the SDelete command with the -s parameter to include subdirectories and -r to remove read-only attributes.
The full command will look like this:
SDelete -s -r C:Media After running the command, the output will show the number of directories and files that were deleted.
Other Uses of SDelete
In addition to securely deleting files, SDelete offers several other features for managing data. Here are some additional ways you can use SDelete.
Manage Unallocated Space
The -c parameter allows you to clean up unallocated space previously used by deleted data without affecting your existing files. To use this, type SDelete followed by the -c parameter and the drive letter. For example, to clean up free space on the F: drive, run:
SDelete -c F: Specify the Number of Overwrite Passes
By default, SDelete overwrites the unlocated space once to make the recovery process difficult. To make data recovery even harder, you can use the -p parameter followed by a number to set multiple overwrite passes. For instance, using the following command to overwrite the target three times, and so on:
SDelete -s -r -p 3 C:Media SDelete goes beyond the conventional delete action offered by Windows and other operating systems. Cleaning up your disk space with SDelete will ensure nobody can retrieve any data when you trade in or give away your PC. Even then, disposing of old tech is risky. Here are the things you absolutely need to do before selling your laptop or phone.
