One of the things I like most about Windows is the ability to customize your PC down to the smallest details. With Rainmeter, you can customize your PC like never before. Here’s everything you need to get started.
What Is Rainmeter?
Contrary to its name, Rainmeter is not a widget that shows you how much it’s raining outside—a mistake I made when I first heard the name back in 2014.
Instead, it’s a desktop customization tool that allows you to display customizable skins on your desktop. These skins include all sorts of different widgets including clocks, calendars, small utilities, shortcuts, and more to give your desktop the look and feel you want. You can even create custom Windows desktop icons with Rainmeter.
Rainmeter does more than add fluff to your desktop. A lot of Rainmeter widgets are actually useful and can show you data like system temperatures, resource usage, currently playing music, and more.
Its capabilities extend beyond monitoring, too. You’ll quickly find plenty of Rainmeter skins with functional tools like notepads, to-do lists, custom shortcuts to launch apps, and more.
Rainmeter is also an open-source program distributed for free under the GNU GPL v2 license. What that means is that the program is completely free and so are the thousands of pre-made skins you’ll find on the internet.
It’s compatible with Windows 7 or above and is surprisingly lightweight, so you can change the look and feel of your desktop even if you’re on Windows 10.
Unless you stack your desktop with widgets upon widgets, you should have no problems running Rainmeter on just about any Windows machine without much effect on performance, if at all.
Downloading and Initial Setup
One of the best things about Rainmeter is the fact that it’s extremely easy to set up and use. Initial setup simply requires you to download the latest version from the official Rainmeter website and run the installer. Then you’re good to go.
If you’re launching Rainmeter for the first time, you’ll be greeted with the default Rainmeter skin with a few widgets and a welcome note. From this point onward, you can ditch the basic skin and start looking for something that matches your taste.
If you’re worried that Rainmeter will affect your gaming performance, there are plenty of ways to prevent it. Additionally, common Rainmeter issues are rather easy to diagnose and fix, and chances are you won’t be running into them on your first go.
Finding Rainmeter Skins
There are thousands of Rainmeter skins scattered around the web, with plenty of websites offering them for free. I use DeviantArt the most, but you can also check out RainmeterHub or VisualSkins if you need more options.
Finding the right Rainmeter skin is simply a matter of scrolling long enough. Whether you want something minimal or want to turn your desktop into a sci-fi movie-inspired hacking machine, it’s all there for you.
Since most, if not all, Rainmeter skins can also be customized by editing the core files underneath, it’s best to start with a skin as a base and then add more widgets or skins on top to match your needs and aesthetic. Most Rainmeter skins are uploaded as .rmskin packages that you can install like a program and load up instantly.
If you’d like something minimalist, we’ve got a list of the best Rainmeter skins for a minimalist desktop. On the other hand, if you want something sci-fi that completely transforms your desktop into a rather futuristic console, you can try this S.H.I.E.L.D Rainmeter theme. If you like a clean desktop with no icons, here’s the Rainmeter layout I used to get you started.
In my experience with the Rainmeter community, chances are you won’t find something you like straight away. Instead, you might like one component from one theme, and a few others from another.
The good thing about Rainmeter is that it allows you to bring together elements you like from different themes. You can even add in your own wallpaper to make a desktop truly unique to you.
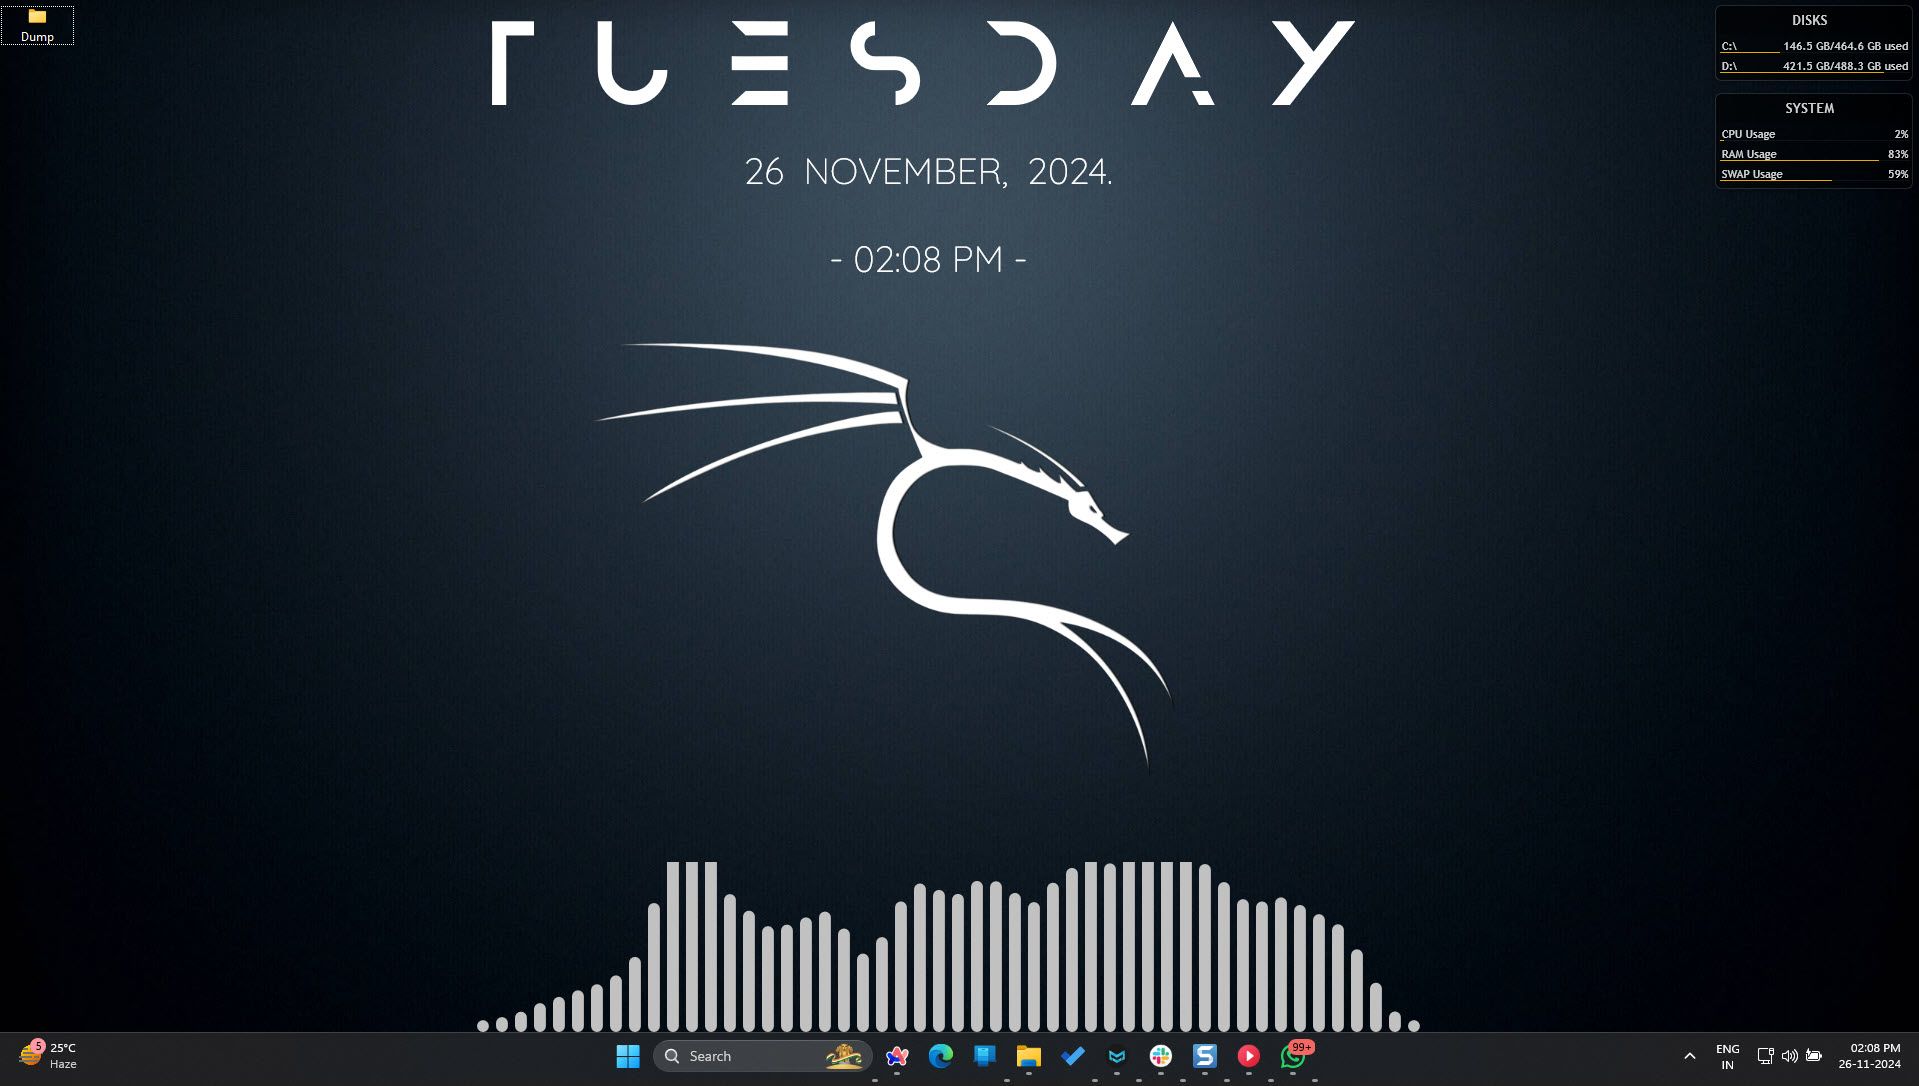
For this reason, you’ll find more widgets, effects, and small tools rather than full-on skins. These tools can then be used either by themselves or with other elements. In the screenshot of my Rainmeter theme above, I use the clock from one skin, while the audio visualizer came from another.
Customizing Skins to Your Taste/Requirements
Most Rainmeter skins will give you some customization options out of the box. Pretty much every skin comes with an .ini file for each element that contains that individual element’s settings. This file is usually either called settings.ini or is named after the particular skin you’re using.
For example, if you’re setting up a Rainmeter clock skin, this settings file will contain options for the type of clock, the font being used, whether you want it to be in the 12 or 24-hour format, colors, and so on down the list.
Some developers add a custom UI to the settings panel that makes it easy for novices to quickly make the changes they want and save them. You can quickly access them by right-clicking the skin you want to change, hovering over the skin name, and finding the .ini file you want to edit.
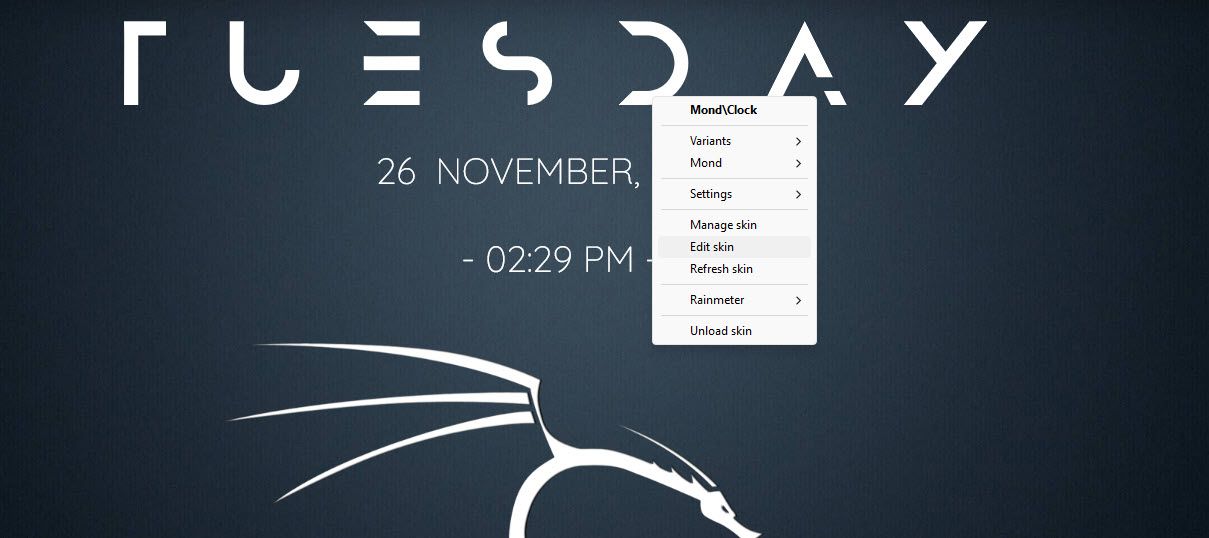
However, sometimes you won’t find any UI to help you, in which case you have to edit the skin’s source .ini file. You can access them by right-clicking a skin and selecting the Edit skin option.
If you find yourself staring down a notepad file with no idea of what the text inside means, don’t be afraid. Chances are there are either comments on critical areas you might have to change or the developer has provided some documentation online.
A lot of weather skins in Rainmeter require you to enter your location code from a compatible service they support before the skin can show your area’s weather. If such a skin doesn’t come with a settings interface, you’re going to have to enter this location code in the skin’s source .ini file.
Ultimately, it’s just a matter of reading carefully and figuring out where the location code is, and replacing it. It’s much simpler than it first looks, and a little bit of patience will go a long way here.
Eventually, you’ll be able to understand these source files better and make more changes to further fine-tune the skins to your liking.
Creating Custom Rainmeter Skins
As complicated as Rainmeter skins might look, all you need to make them is a text editor and Rainmeter itself. Rainmeter can create text and simple or complex vector shapes like rectangles and circles by itself. However, you’ll want a separate image editor like Photoshop or GIMP for more control.
You can check out the Creating Skins section in the Rainmeter documentation for an in-depth explanation of how a skin functions underneath and what commands and options you might need to specify.
Custom skin creation starts out simple but can get really complicated as you add shapes, sizes, colors, fonts, variations, and other vector graphics. However, from this point onward, the sky is the limit.
Rainmeter is a great way to get into modding and customization. It’s easy to use, light on your PC, has massive community support, and overall, is one of the best free tools you can use to bring your desktop to life in unique ways.

